Learning to Fly

My experience in baseball has encompassed many areas and reached great heights. I played the game professionally, I coached for three decades from the rookie leagues to the major leagues. After a near eight year run as a major league coach, I climbed back on the busses to coach in the minors once again last season. The little league fields have not escaped my coaching journey, my son played baseball from age seven to age twenty three. I have coached girls Fastpitch softball, my daughter was one bad ass Division I softball pitcher. My point of sharing these experiences is that the author of this article knows a lot about throwing a baseball or a softball for that matter. This article is not about me, it is about teaching kids how to throw properly it just happens to be written by a man who broadly smiles when his students improve.

Kids come in different sizes and shapes. They do come in varying measures of athleticism, These boys and girls have unique personalities and, this is an important and, they come with their own learning abilities and style. The hardest thing in coaching is finding ten different ways to say the same thing. A great coach establishes some kind of relationship with the athlete to where The coach has some idea of what makes the student tick. What other activities do they have in their lives? Another question that is important is, where has your young student been in their baseball classrooms. What I mean is, have they had a prior pitching or throwing coach. What did the coach teach? What is extremely common today is what have you learned on the internet about pitching or throwing a ball. There is so much information available, it is simply confusing. Many folks are capable of gathering data and information but few are capable of breaking it down to the student standing in front them, speaking that child’s language, creating drills that are individual for his or her needs.

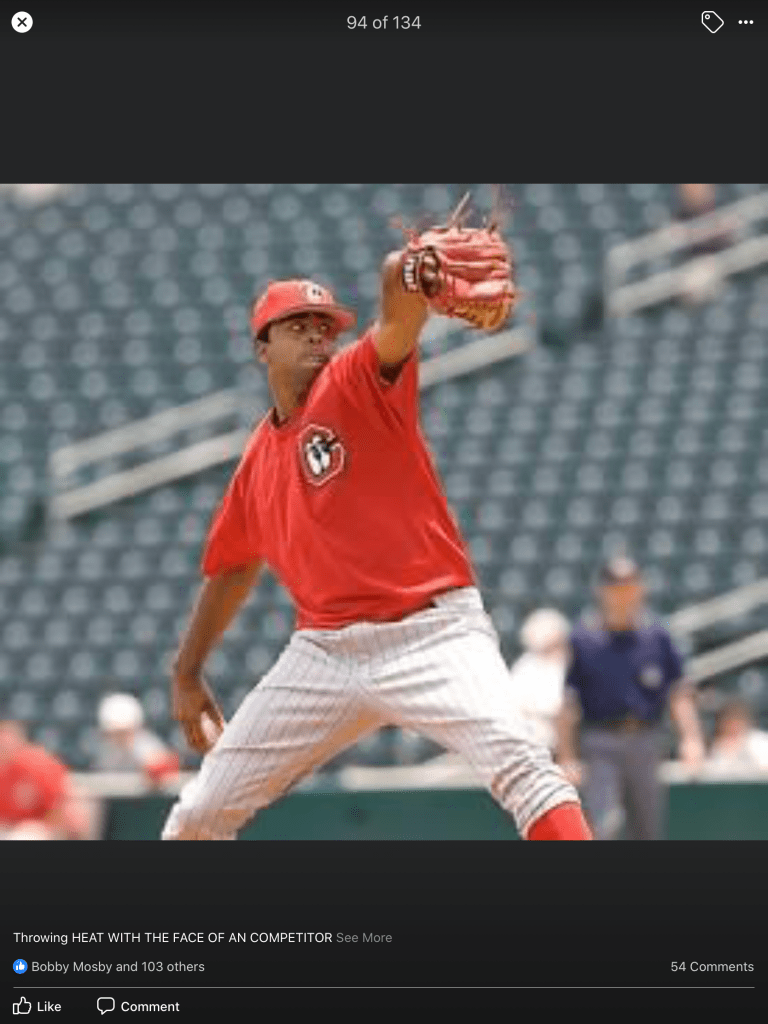
When it comes to throwing, consider this lesson one. An assessment of a players skill level and athleticism can come from observing a simple dynamic warmup and by playing catch. Some youngsters can move on to the pitching portion of instruction. However, many children need help learning to fly ( throwing a ball with force and a smile). Throwing is a toe nail to finger nail movement. Each of the body parts in between play a key role. The way each of those body parts move is important , when they move, how much range of motion , how strong is each muscle or body part is crucial, as well.

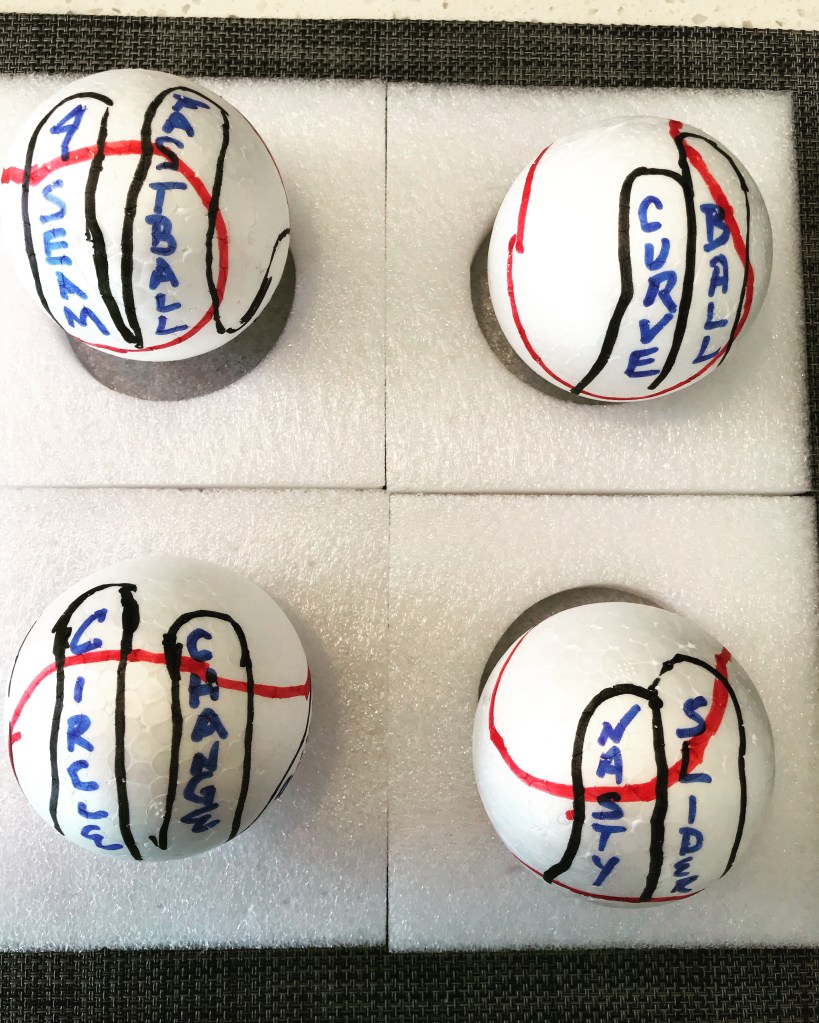
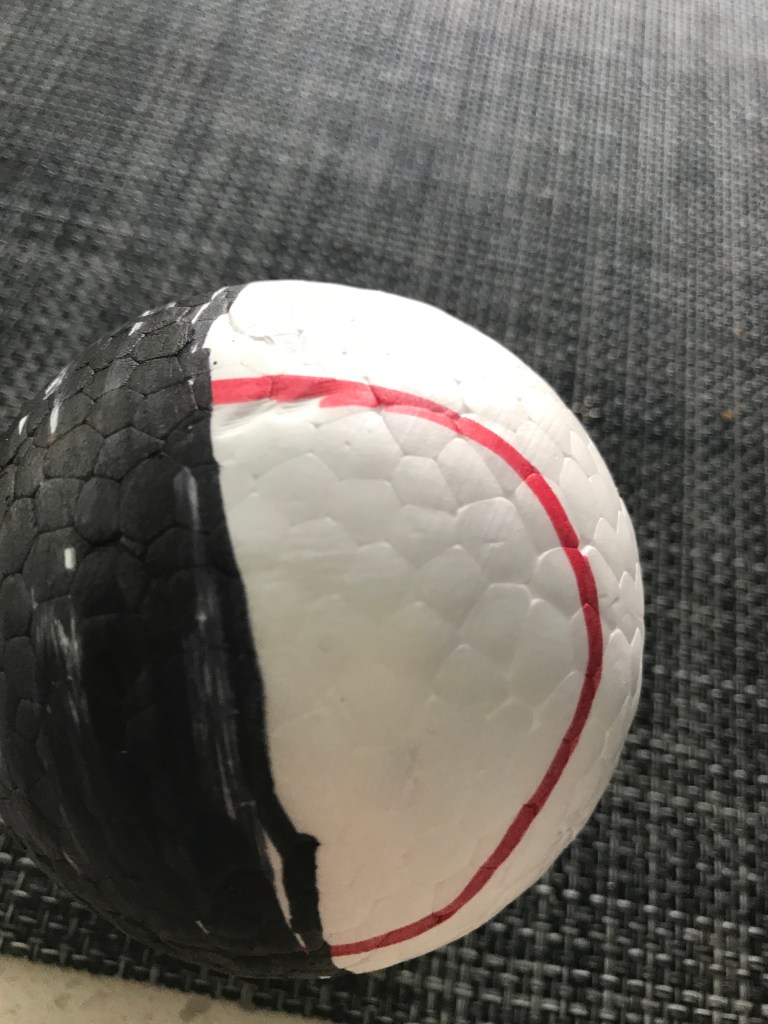
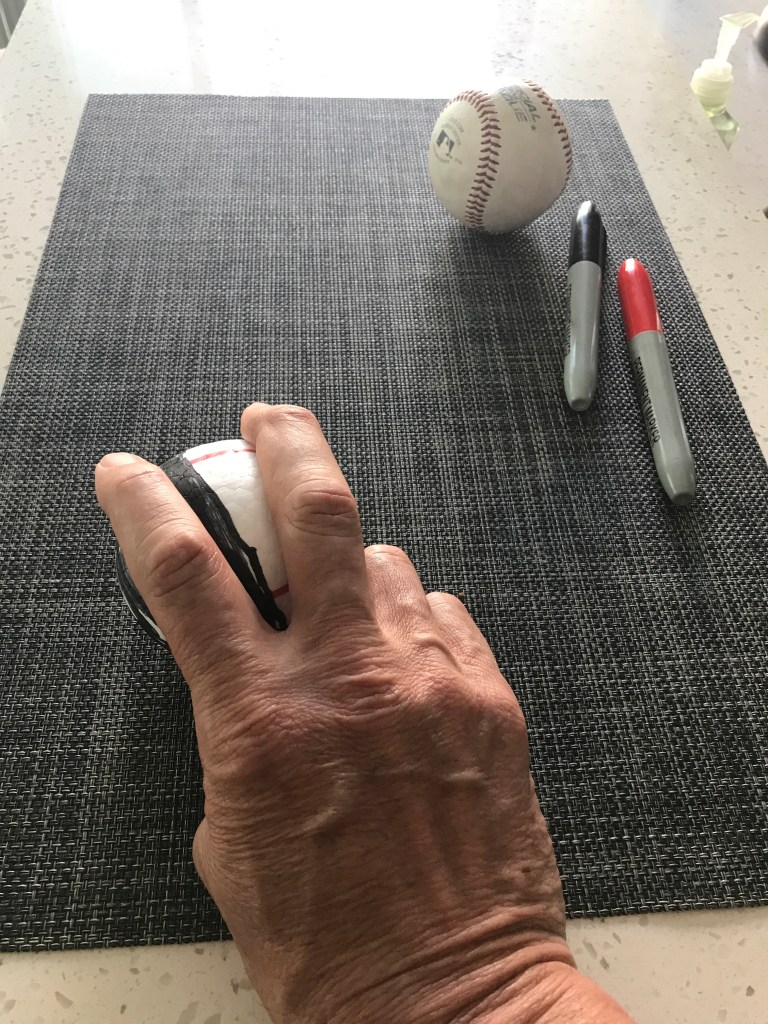
I gain a lot of information by playing coach with the pitchers. And I have played catch with many little leaguers, major leaguers, softballers, major league all stars, and even a baseball Hall of Famer. There is a lot to be learned by paying catch, (please read Playing Catch and The Rhythm of the Universe, an article written by David Laurila on the Fan Graphs web site). I like to see how the pitcher is gripping the ball, this detail is very important. The grips effects the direction the ball spins, the grip can help or hinder the amount of spin and how the thrower commands the ball. Once, we have the correct grip, correcting the athlete from the ground up is the most effective methodology. Footwork is a critical cog in throwing powerfully and accurately. Time spent on developing elite footwork takes time, effort, patience but in the end we need this part of the foundation to be rock solid. The throwing side foot plays a big role. Teaching your thrower how it should work, what it feels like when done correctly is a big teaching moment. The lead leg action falls right in with the other moving parts of the throwing motion and gives the pitchers good direction towards the target and the landing leg will eventually stop the forceful momentum creating by the pitcher’s back side as the ball is delivered. Sounds complicated but it isn’t. The glove arm has a purpose and this is often taught incorrectly Think of this, the catcher has a hundred dollar bill in his mitt and as you begin your move towards home plate, the ball out f the glove- you are going to teach into that catchers mitt with your glove, get the hundo and put it in your shirt pocket. Simple stuff. The motion of the throwing arm needs some individualism to it. Remember, the length of this lever is always changing if the thrower is still growing. The best arm motions I have seen come from taking the ball from the glove with fingers on top. And think your throwing hand traveling in a circular motion back and then moving the arm forward. The best throws will come from your elbow passing the ear at shoulder height. Having you hand and fingers behind the ball at release is extremely important to a successful toss. Some throwers have found their ideal arm angle or arm slot by throwing balls heavier than baseballs, like a football. When thrown beautifully the football has a spiral. When using heavy balls, remember to use your baseballs at the end of the practice session. Let’s keep throwing fun, let’s have a growth mind set that everyone can improve and let’s teach with simplicity, passion, and facts.

The basic four

The quarantine training balls. Each grip illustrated
This young lady learned a nasty slider in 30 minutes using the quarantine training balls
This power curve was enhanced with the feedback of RM’s quarantine training balls.
Filthy moving changeup grip was explained using quarantine training balls
Four seam fastball quick tutorial
One knee fastball drill emphasizes staying behind the fastball with the fingers, hand, wrist, chin and chest

I Need Tempo

Great drill for a crucial aspect in throwing. Rhythm and Timing

Rhythm can be defined as a repeated pattern of movement. Tempo is defined as the speed of motion or activity. Rhythm and tempo are an integral part of athletics. However, it is rarely practiced or emphasized. Let’s change that. The above video is a great drill a quality

for pitchers. All the positions on the field need proper rhythm. The infielders have a tempo they get into with their feet and hands as the pitch is being thrown. This is what creates first step quickness’s and anticipation. The outfielders get into a rhythm as the pitch is thrown as they must be on the balls of their feet react to move in any direction. The great fielders have first step explosiveness. A catcher gets in rhythm with the pitcher and the way he sets up. How and when he flashes the target. Too late of a target isn’t productive, too early causes rigid ness. Aside from baseball, think of the best free throw shooters in basketball, they possess that rhythm and tempo at the line. Remember that repeated movement pattern and the speed at which it happens. How rhythmic is a hoops player when he is on a hot streak? How about the NFL quarterback in a good rhythm, he picks your defense apart with accurate , quick passes. Often a strategy to beat the best shooters or quarterbacks might be to disrupt their rhythm. That is how important rhythm can be to an Athletes success.

Timing drill. Ball from glove at proper time

This is another drill to work on the rhythm and timing of the proper ball from glove separation. If the ball comes out too late, the throwing or pitching delivery breaks down. A loss of power and accuracy results. The chance of injury increases. I am sure hitting coaches will see how important rhythm is to hitting and the timing of when the hitter begins he move to the baseball is crucial. The base runner and base stealer need to get into a rhythm with the pitcher to get good jumps and take the extra base. Think of ways to improve your rhythm and to be more consistent with your tempo. Take ownership of your tempo and work on it. Being able to repeat in crucial situations with help with your success whether your on the little league field or have 40,000 chanting your name, breath and maintain your rhythm and tempo.

Rest In Peace- Justin Mallett

An amazing part of being a coach in professional baseball the last thirty years is the amount of unique people that you meet. These baseball players come from all walks of life. The kids arrive from every region of the United States and from every corner of the world. The players come from very different socio economic backgrounds as well. I feel fortunate to have met so many young men over the many years. I taught them and unknowingly, they taught me. I have a certain curiosity about people. A quality coach will always try an establish a relationship with his player. I once read “ you must know where a person has been before you can tell them where to go”, I believe that statement to be true. The only way to find out where the person has been, is to ask questions. This question and answer conversation can lead to a relationship with the player that allows for teaching, listening and it allows for the acceptance of constructive criticism. This step is a building block for getting better prepared to be a successful major league player. I could write about former players and how our player/ coach bond has continued once their careers ended. Or even how the influence of our time together impacted their lives, their careers and now their own young baseball player. But this story is dedicated to one smiling young man from the rough area of East St.Louis.

Justin Jamarr Mallett
1981-2020

I met Justin in 2006 when I left AAA Louisville to become the minor league pitching coordinator for the Cincinnati Reds. Justin, the tall, enigmatic right handed had signed a professional contract with Reds in 2003. My first impression was a memorable one. Justin introduced himself with a large smile and a firm handshake ( he had big hands which are great for pitching) Justin was a good citizen who enjoyed minor mischief. It wasn’t uncommon to hear his last named yelled from across the training complex. This is probably about the time I asked Justin how he got here and where he has been. He educated me about ESL. The city was named America’s most dangerous and Mally’s real life descriptive account was surreal. I always found time each day in training camp to check on my new friend and I developed a soft spot for some of his fun loving mischief.

One of the big days in minor league baseball camp was the pitchers’ two mile run. It was a conditioning test. All the pitchers had to complete the run in fifteen minutes or less to be able to make a team. If one fails the test, they can be retake it after showing up at 6 a.m. for extra conditioning. The running course goes outside of the training complex, along the surrounding sidewalks and ends up on Field 4, right field line. The training complex is made up of four practice fields, the game stadium, covered batting cages, a half field, lockers rooms with administration buildings, atop. There is also a small pond. Trees or tall shrubs surround the outfield fences on the four practice fields, this not only has nice curb appeal for the fans but allows for the players too see better while hitting. If there is no dark background for the hitter, the pitch can be hard to see from the pitcher. So, the trees provide a cover for those looking out and for those trying to look in. The test begins at the gate leading out to the street. A strength coach starts the group there and meets them inside the training complex on field four, where the run ends. So, the view of the players running can be shaded or even blinded by those coaches on the inside, who are timing the conditioning test. The race can create lots of yelling, pulling for one another. I waited near the finish line and there were screams of how much time was left,the yelling for your partner to make it. Out of the shadows sloppily running through the gate was my man, Justin Mallett. He was going to make it. It was a little surprising because Justin was struggling some with the daily running leading up to the two mile test. I was happy for him, as were his teammates all of whom he had endeared himself. Later, that day the chief strength coach, creator of the grueling test came to speak to me. He was angry. He was grouchy! He told me one of my pitchers began running the two mile run, that player then ran into the shrubs, pulled out a bicycle and rode most of the run. He the disposed of the bike and ran to field four to pass the test. That player was Justin Mallett. I laughed. I also thought it was genius. He wasn’t punished if you were wondering, what ingenuity!

RIP my brother

In late March of this year, Justin was killed in a traffic accident on US 41 in Palmetto, Florida. He was only 38 years old. Justin was fatally hit by a ticketed motorist for running a stop sign. Justin was on his motorcycle. He left behind many grieving friends. He sadly left behind a devastated family. I am thankful for having crossed paths with this smiling young man. I am saddened to know he is gone. Justin created many memories for those who knew him and he established countless relationships that will withstand this tragedy. God Bless you, Mally. RIP

How Fast is a Fastball

One pitch that every pitcher throws is a fastball, even if it is slow, we call it a fastball. Fastballs definitely come in different shapes, speeds and sizes. As far back as little league baseball there are those who throw harder than the rest of the herd. Those players are generally very good at baseball or softball. I mean the game is all about catching and throwing the ball, right? The pitcher throws the ball to the catcher, the batter hits the ball to shortstop who then catches it and throws it on to first base. Throwing the ball is an vital ingredient to the game and we all need to be good throwing the ball. Let’s talk about the fundamentals of the fastball. The grip, so often overlooked, is important to throwing the ball fast and with accuracy. The four seam grip is one all players should use when when they warmup and from each position they play. Physics tells us the four seam fastball , rotating quickly through the air keeps the ball straighter than the other grips, the ball has more spin and has better “ carry.” Alan Nathan, masterfully explains the physics of baseball and is the sports’leading analyst in this field. The video below explains the grip

Discussing the four seam grip

There are different fastballs; four seam, two seam, split fingered, cut and batting practice. Let’s stick to the most basic today, the four seamer. I have had the benefit of working from Little League to the Major Leagues and every level in between from travel ball to minor league baseball. I have coached girls as well, from youth to teens. The foundation of your fastball starts with your grip. Being good at throwing fast and accurately can take time but it is an amazing journey. It takes deliberate practice, consistency and takes being persistent. I have witnessed many players develop powerful throwing arms, I have seen many players increase their accuracy; success at any level is enjoyable and worth the time put in to improve. Spin on the baseball can give us feedback to whether we are throwing correctly or not. A good practice drill for this is to take your ball and color half of it black with a sharpie. ( dissecting through the four seam grip). The colors or shading of the ball will be apparent when throwing the baseball or softball properly- the thrower’s fingers, hand and wrist behind the ball at release. The wrist making a wave good bye motion and the fingers coming down and through the ball. I have seen coaches uses black electrical tape for shading the ball for this throwing drill as well. Once, we can do it right at 25 feet, take four steps back and so on. Another variation is to start with the throwing side knee on the ground. This let’s us just work on the path of the throwing arm, the grip and the release of the ball.

My inside practice ball. It is colored half black, detecting through the four seam grip area.
The Grip. Simple tools to get the ball ready. A hard ball for outside practice
One knee drill showed. Notice the fingers behind the ball at point of release.

We want to be able to measure our successes and gains in fastball speed. Once players arms are in proper shape there is nothing wrong with measuring a players progress. A tool I use is the Pocket Radar. I bought mine on Amazon. The measurements make it fun for the players, especially when they are young. Remember, that we want to celebrate effort and improvements. I have found that this quantifying of speed has kept my players working on their throwing fundamentals when they are at home, not just on the practice field. Coaches, we can measure speed on balls thrown from any where on the field, not just the pitchers mound. We get a baseline speed, record it and then measure improvement. Heck, I often measure the speed with the player throwing into a net. Build a strong foundation, grip it correctly and rip it with intent! Let me know how fast your fastball is.

Changing the changeup

The pitch referred to as a changeup is an excellent weapon for a pitcher to have in his or her arsenal. The pitch when thrown with confidence has made those with marginal talent -good. It has made those pitchers with good talent into millionaires and it has helped those with above average ability- into super stars. One does not have to look anywhere but the 2019 World Series to see Max Scherzer and Stephen Strasberg dominate the opposition with a flurry of nasty,diving and darting changeups. The pitch should be developed and utilized by all who want to become a pitcher. Velocity is king these days but there is NO reason a pitcher can not learn to change speeds with his pitches. One may ask, “ why is it important to change speeds”. Well, the answer lies with your opponent, the hitter. Hitting with all of its new gurus abound, still comes down to one important thing, timing the pitch. If the batter swings early or late, the ball is put in play slowly or completely swung and missed. Being a long time coach I am confounded when pitchers are reluctant to learn a changeup. Maybe it is the name, it isn’t macho enough. Terms like power change, spread change, ring finger change, 601 change are all more powerful words than simply changeup. Mentality is a key when throwing your nasty changeup. Let’s take a look at a few grips.

The okay or circle change has many variations depending on fingers length.
Bugs Bunny or 601 change befuddles hitters. Practice with fastball like arm speed
Use a variation of this grip. Slider the thumb up towards the index finger to slow it down even more

The videos show three nasty changies that I like. We know that quality changeups are slower than the fastball, they have less spin than the fastball and they have equal to or better than release extension of the fastball. These can be areas of emphasis when learning to throw one. Of course we want the same arm slot as the fastball as well. A common mistake in learning this pitch is trying to place it in the strike zone. The pitch just needs to look like a strike for the majority of its flight towards the batter. Find an aiming point on the catchers body to start your changeup is important. You want your disgustedly good change to look like a strike and the movement will take it to the bottom of the strike zone and below the zone. When the catcher gives you the sign, universally, a fingers wiggle, grip it and rip it. Check out these quarantine nasty pitches thrown with our styrofoam balls.

Check out the release on this spread change. Excellent hand position and the ball action is unreal
This okay change has late action. The pitcher sold it using fastball arm speed and finish.

Some common questions are about the speed of the change. There isn’t a magic number or percentage of velocity but let the hitter tell you if it is too hard. If so, spread your fingers some and/ or Move the middle finger away from center of the ball. You can find away to kill spin with your grip, the depth of the ball in your hand. You can do it, deliberate practice is the key to designing a nasty change. Also, I am asked if it is hard on the arm. There are no studies out there to suggest this issue. One big thing the change does, it keeps pitch counts down. If your son pitches in little league or you coach a team you know pitch counts are crucial to survival in a tournament. Be safe everyone

Stay home sliders

Today let’s learn how to throw a slider the right way. We are using styrofoam balls for a few reasons. One, we are indoors and don’t want to beat up the walls. Two, the styrofoam balls give the thrower instant feedback. If you throw it correctly the wicked break is easily seen, if not, you spike it in the dirt or it floats the wrong direction. Three, it is safe for all ages to learn. One of the throwers you will see in the videos is a female. She has never thrown sliders, curves and change ups but in the upcoming weeks, she will throw them with brilliance. The next video will talk about the proper grip.

Gripping a disgusting slider

We will speak about grips all the time. Good grips are the foundation to throwing the ball whether from the field or from the mound. To be good at throwing or pitching we need a strong foundation. The grip is just that. The slider grip is easy to find working off the center of the ball. The pads of middle and index finger are hooked fairly on the seam. The next dynamic part to this equation is the action of the hand and fingers at release. Remember, we will always get our hand in to the Magic Circle when leaving the glove. Once our hand is passing our head on the way to release point we will move into the release action. Throw the pitch with a loose arm but the slider is a violent pitch. The video below will show us more

Slider chop

Told ya it was violent. The slider takes deliberate practice. One can transition from styrofoam ball to baseball with no problems. Remember that picking a starting point to aim at is important. While the curve will have a lot of vertical break, the slider will have more horizontal break. It is thrown with velocity and has a similar trajectory of a mid thigh high fastball. This pitch takes some strength to be thrown properly. I prefer young pitchers choose one breaking ball, the slider or the curveball. For a young pitcher to have two breaking balls is very advanced. Enjoy the stay at home sliders, you will be spinning them off the mound one sizzling summer day soon.

Check out finger action, late break
Wicked spin
Stay home slider

The Learning Curve

The Curve Ball Release

This time of quarantine I have searched for something fun to do inside this beautiful apartment. I also want to keep teaching everyone about baseball, throwing and pitching. We are going to introduce how to throw a curve ball correctly, while inside the crib. The most frequently asked question about the curveball has been; how old should my son or daughter be before they begin throwing the curve. Well, ASMI.org is the best place to find the answer to your youth pitching guidelines. Pitch Smart is also great, find it via Mlb.com.

Tracing the proper grip on my styrofoam baseball

We are learning to throw the curve properly using a styrofoam ball. It does not strain the arm, it is fun and it is educational. We taught Mom how to throw a nasty curveball inside the apartment. The grip, as you see from the video, is important. The emphasis is on the middle finger. The index finger is along for the ride. Use the side of your thumb so we can get the most spin possible. We have our grip, our release position at release ( think of holding a glass of water out in front of you.)

Proper release position. Get your glass

Now, let’s throw a few quarantine curve balls. Make sure to pick out a starting point- where we aim the ball- because your pitch is going to curve. A good curve breaks up to down, top to bottom or if you like it breaks from one o‘clock to seven o’clock, if you are right handed( face of the clock). Now, as we learned in the past, let’s grip it and rip. Enjoy and stay healthy

Curve ball. SLO mo
She learned a nasty curve in minutes

Let it Eat

Let it Eat

This is a fun drill for any overhand thrower. Baseball or softball, young or old. On the included video, we did the drill inside a batting cage. It can also be done in a net in your backyard or there are so many portable nets I have seen on the baseball and softballs fields. I like this drill because it encourages athleticism and it promotes throwing fast. If your team has a pocket radar gun or some type of device to measure throwing velocity, use it. It makes the drill more fun for the players. The players I have seen make a competition or game out of it. One can keep score on who improves the most, not who only who throws the fastest. This often leads to your players towards learning the proper warm up, to practice away from the field, to do the band work that we are going to introduce and to improve their athleticism by moving fast. To do this drill get 40-50 feet away from the net. In our video, we were thirty five feet away from the net. Our player in the video, Payton, gained about 25 feet in his momentum moving forward. He used a simple step behind foot work, a simple shuffling of the feet. One can also use heel to heel shuffle forward. This is the footwork involved in throwing the ball across the diamond or throwing longer distances. The timing of the weight transfer is important when doing this drill and when throwing across the field. When the athlete improves their footwork and improves the timing of proper weight transfer, they will see an increase in velocity. That is a reason we want to measure and document each players throwing velocity and their increases. Remember the grip we use is extremely important as well. What else is important , come on? The throwing hand and arm working in the magic circle. This is a drill I like because it is enjoyable for the athlete, it teaches athleticism and it is a skill we can measure. Each coach can add his or her own twist to make the throwing drill more fun to his or her particular team. A fun fact for everyone, an elite throwers arm travels at 8500 degrees per second, meaning the arm would spin around 24 times before coming to a stop! Whaaat! This fact I read years ago in an article in popular mechanics about throwing velocity. Stay safe everyone and enjoy throwing the ball. It is for everyone.

The Triple Lundy Drill

This drill is one for developing powerful movement patterns for overhand throwers. We want to emphasize drills and exercises that cue the body in move in the most efficient and most powerful way possible. The good drills, like this one, can be done just about anywhere not only at the field. This drill does require that the catch partner be ready for some velocity so throwing in a net or fence at a short distance might be the best plan. In this drill we will make three aggressive faux throws to target in the direction we are facing and on the fourth cycle we will pick up our glove side foot and turn to the glove side and throw the ball fast to out net a short distance away. Accuracy is not the emphasis of the drill. This drill begins with the thrower in an athletic stance, feet shoulder width apart. The throwers hand are together at mid chest height, in a direct line with the chin and navel- remember center of mass? Of course, you do. Rotation of the upper body is an important part of this drill, make sure you are getting a nice turn. As we begin our cork screw turn the ball will separate from the glove, the hand will travel through the Magic Circle, the glove arm reach out towards the target, while remaining flexed and natural to the particular athlete. The glove arm will work back towards the body as the throwing arm unfurls forward with proper wrist snap and finish. We want the fake throws to be aggressively emphasizing arm speed. Make sure we get the same coil on the throw forward. Lift your lead foot as the ball seperates from the glove, stride towards the target and let the ball fly. Do this drill on days you want your athletes to work on velocity and power. I have had six players at a time in a batting cage doing it. Remember, the distance is short, it is for all ages, throwing into the net or fence is suggested. The drill is named after a good Rodney Dangerfield movie which has nothing to do with baseball but the movie is a classic.

Triple Lundy Drill
Triple Lundy